Create and manage clients
Updated September 2026
Clients are the top level of your Studio: every project, gallery and photo lives under one. This article covers creating a client, working in the client workspace, and editing or deleting clients.
Not sure how clients, projects and collections fit together? Read How Afterify is organized first.
Create a client
- Open Studio: the Workspace page lists all your clients.
- Click Create Client.
- In the Client step, leave the Client dropdown on Create New Client and enter a New Client Name.
- Optionally add up to five Client Type tags (like "wedding" or "portrait"), pressing Enter to add each one, and pick a Client Webpage Template if you've made one.
- Click Create Client to finish here, or Select Photos to continue straight into creating a project and uploading.
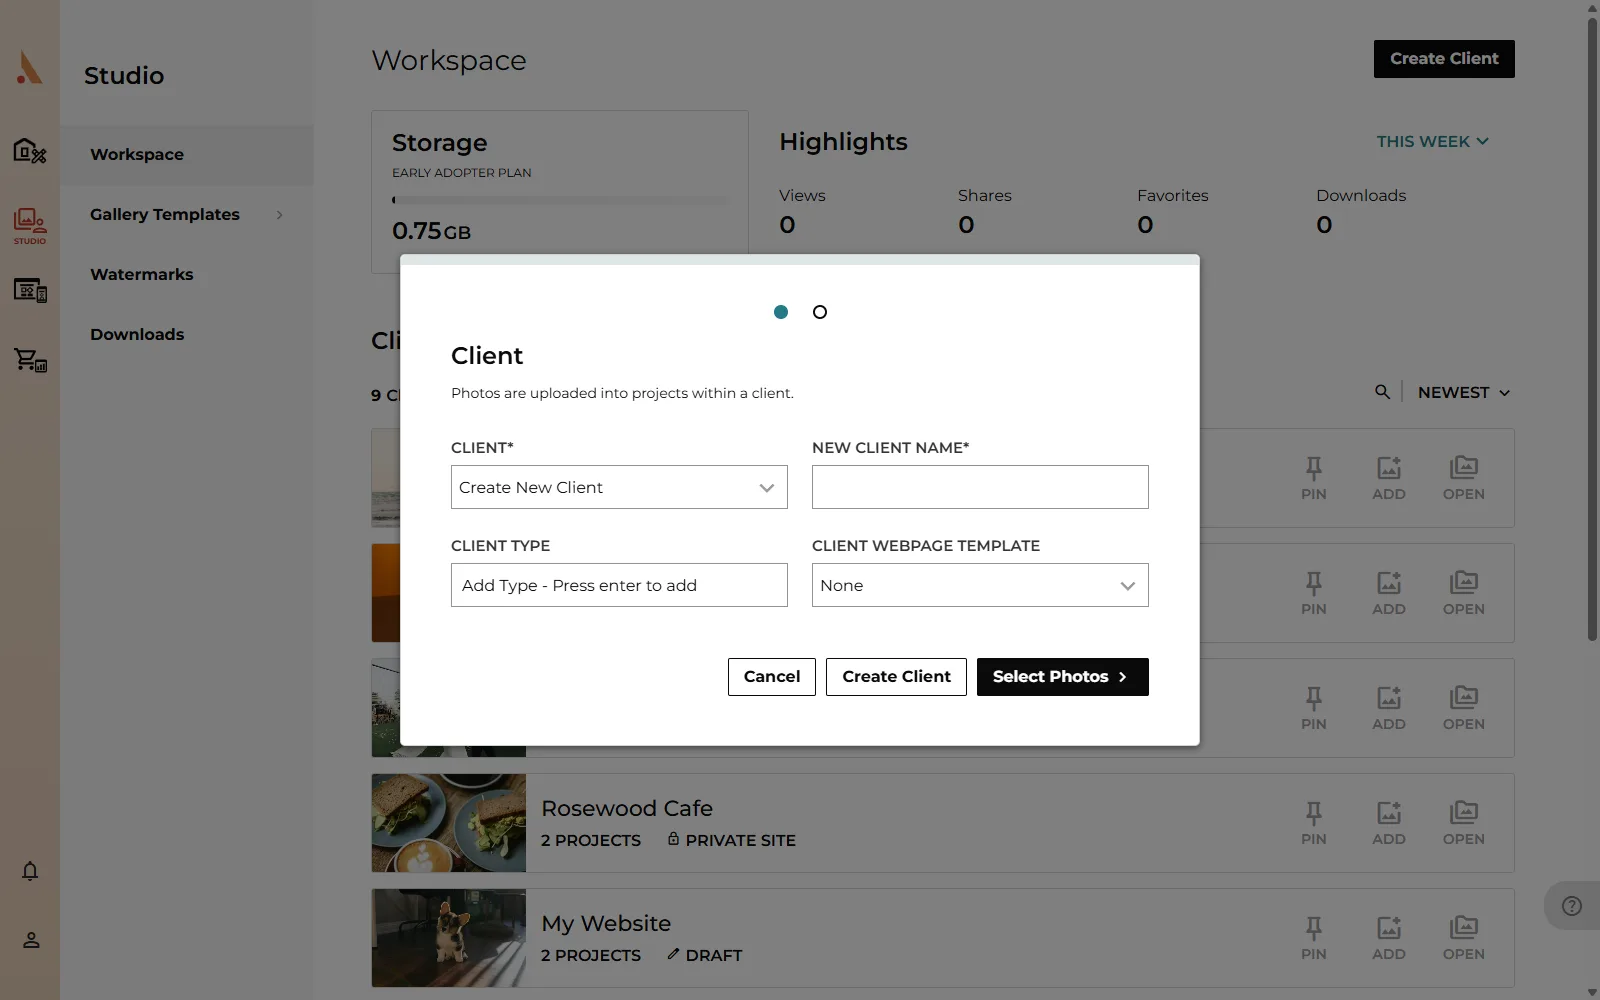 Client type tags help you group similar work, and templates give the new client's gallery page a ready-made design. See Explore gallery templates.
The Workspace
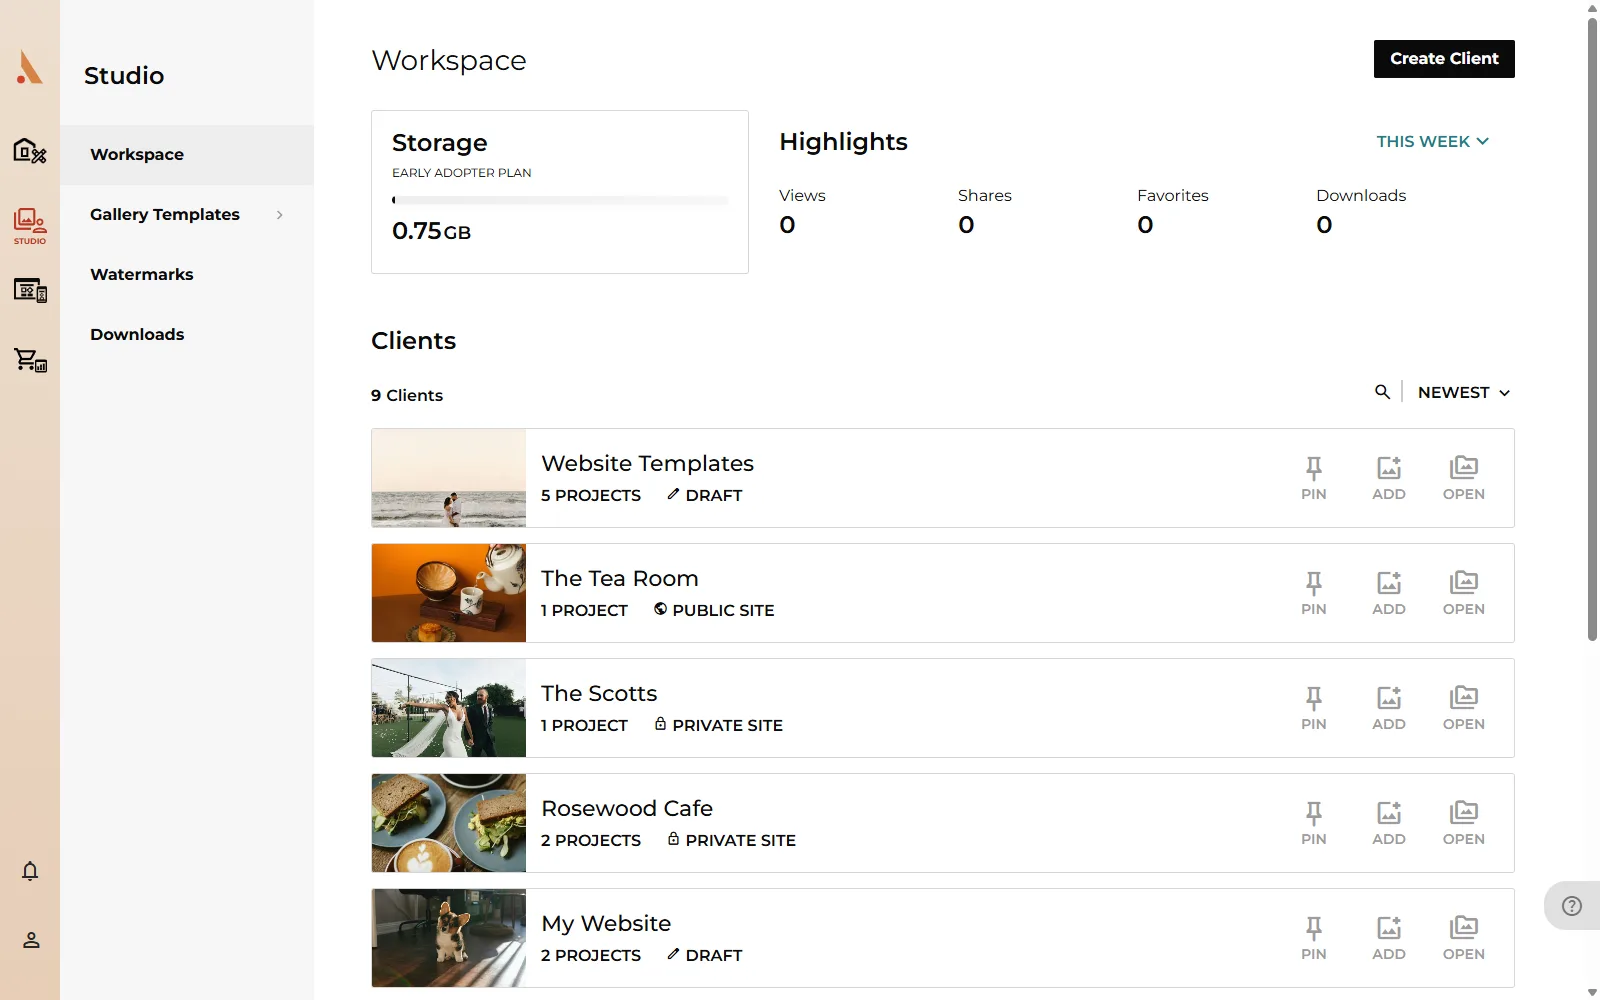
The Workspace shows your storage usage, a Highlights panel with Views, Shares, Favorites and Downloads (switchable between This Week, Last 30 Days and Last 6 Months), and your client list.
- Open a client to see its projects: double-click it, or use the Open button.
- Pin clients you're actively working with; pinned clients appear in their own row at the top. Click the pin icon to unpin.
- Search and sort the list from the toolbar above it. This filters by client name only; to search across clients, projects and photos at once, see Search your studio.
- Right-click a client for quick actions: open its pages, rename it, publish or unpublish it, make it private, or delete it.
Edit client details
Open the client and go to its Settings page.
- Client Information: name, email address, phone number and client type tags. The email here is for your records; sending gallery invites happens on the Sharing page.
- Thumbnail: pick the client's cover image and drag the focal point ring to choose which part stays in view. See Labels and focal points.
- Social Media: save the client's social links so you can find and tag them when sharing their photos.
Click Save in the header when you're done, or Cancel to discard your edits.
Unpublish instead of archiving
There's no separate archive in Afterify. When a job wraps up, set the client to Draft (from the visibility toggle on the client page or its Sharing page). The gallery goes offline but everything stays in your Studio, and you can publish it again any time. See Share a gallery for what Draft, Private and Public mean.
Delete a client
Deleting is permanent and removes every project, collection and photo inside the client.
- Open the client's Settings page.
- Under Account, click Delete Client & Photos.
- Confirm in the Delete Client dialog.
If a photo inside the client is part of an active print order, deletion is blocked until the order is processed. You can still delete individual photos that aren't on hold.
Related
Still stuck?
We're happy to help. Contact support and we'll get back to you as soon as we can.