Create a project
Updated September 2026
A project holds the photos for one shoot: a wedding day, an engagement session, a product shoot. Each project gets its own gallery page under the client, with its own design, sharing and download settings.
Create a project
- Open Studio and open the client the shoot belongs to.
- Click Create Project (or press Shift+N).
- In the Project step, leave the Project dropdown on Create New Project and enter a New Project Name.
- Optionally choose a Watermark to apply to everything you upload, and a Project Webpage Template for the gallery's design.
- Click Select Images to queue photos now, or skip it.
- Click Create Project, or Create & Upload if you selected photos.
Every new project starts with one section called Highlights: sections are how you organize photos inside the project. See Organize with collections.
You can also create a client and project in one pass: click Create Client on the Workspace, fill in the client step, then click Select Photos to continue into the project step.
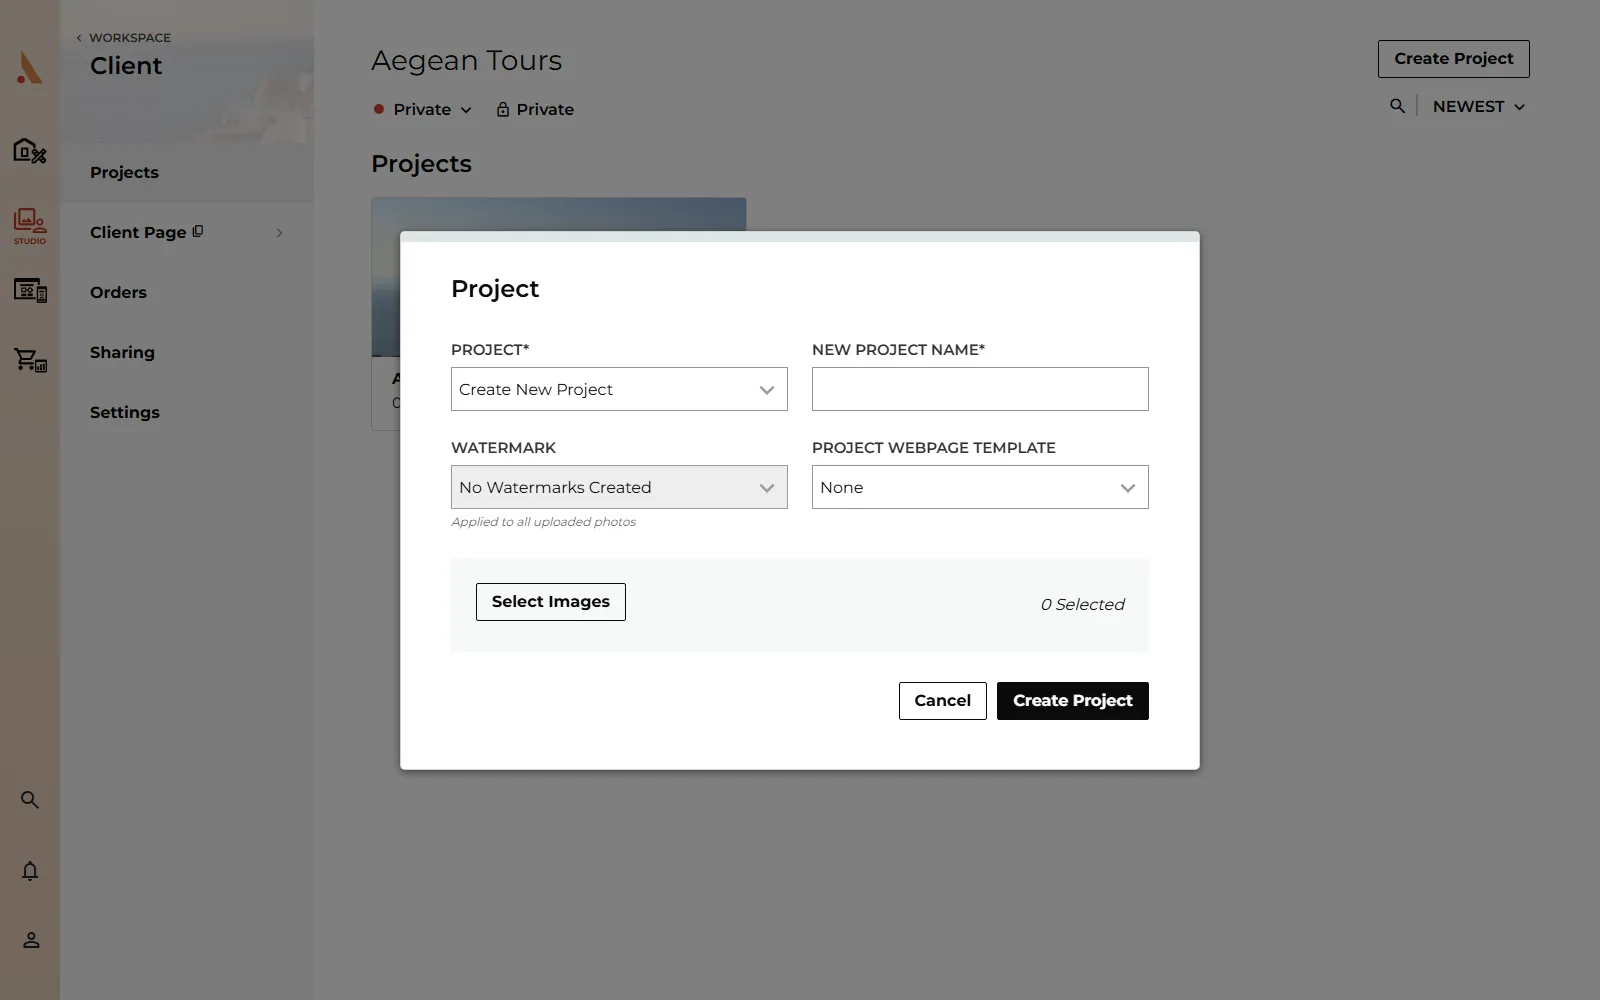
Naming and the project URL
The name you type is the display name your client sees. Afterify also generates a URL slug from it, which becomes part of the gallery link (yourdomain.com/client/client-name/project-name). You can edit the slug later on the project's Settings page; Afterify checks that it isn't already in use.
The project cover
The first photo you upload automatically becomes the project's cover if it doesn't have one yet. You can change how the project's thumbnail looks on the client page at any time:
- Open the project's Settings page.
- Under Thumbnail, choose Collage (a rotating sample of photos from the project) or Custom (one image you pick).
- For a custom image, click the image search icon to open the media manager, then drag the focal point ring to frame it.
You can also right-click any photo in the project and choose Set As Cover (or Add to Collage when the thumbnail type is Collage).
Publish state
New projects start as drafts. The Visibility toggle at the top of the project's Settings page has three positions:
- Draft: the gallery page isn't live.
- Private: live, but only invited users can open it.
- Public: live for anyone with the link.
You can also right-click the project in the client's project list and publish or unpublish it from the context menu. The client itself has the same toggle, and a project is only reachable when its client is published too. See Share a gallery.
Related
Still stuck?
We're happy to help. Contact support and we'll get back to you as soon as we can.