Quick start guide
Updated September 2026
This guide walks you through the core Afterify workflow: create a client, upload photos into a project, and share the gallery with your client. When you're done you'll have covered the same steps as the in-app setup guide on your Dashboard.
New to how Afterify organizes photos? Read How Afterify is organized first: it explains the Client → Project → Collection → Photo structure everything else builds on.
Step 1: Create your first client
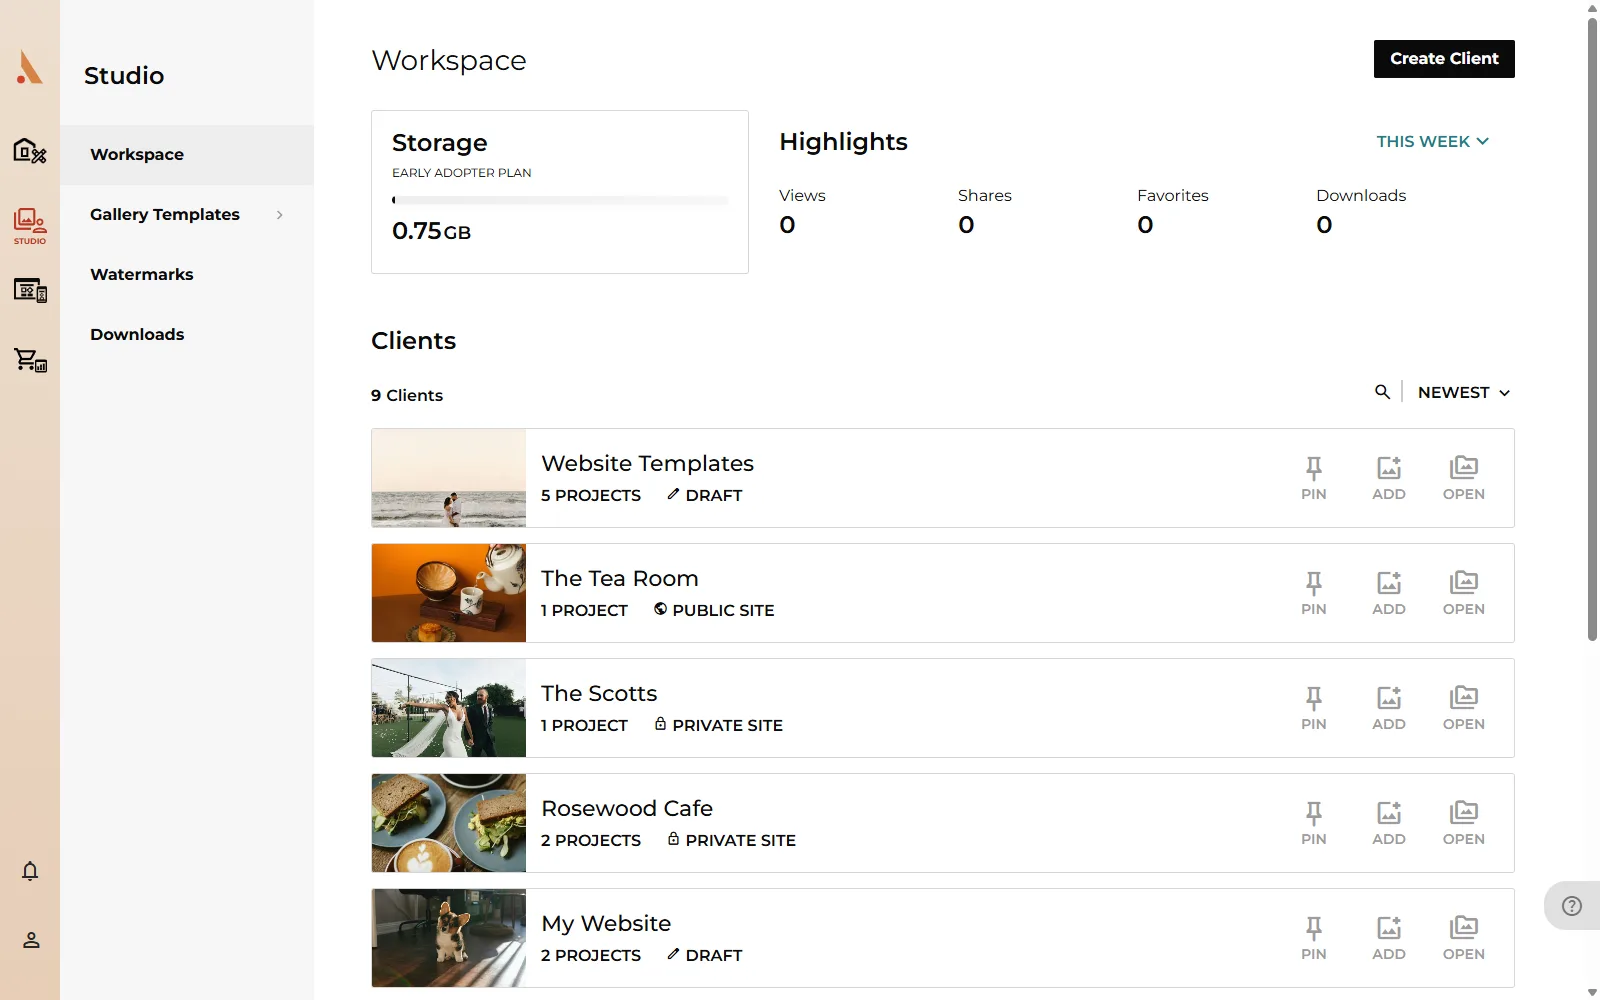
Every gallery in Afterify belongs to a client, so that's where you start.
- Open Studio in the sidebar.
- Click Create Client.
- Enter your client's name. You can add their email now or later, when you send their invite.
- Click Create.
Step 2: Create a project and upload photos
Projects group the photos for a shoot or event: a wedding, a portrait session, a product shoot.
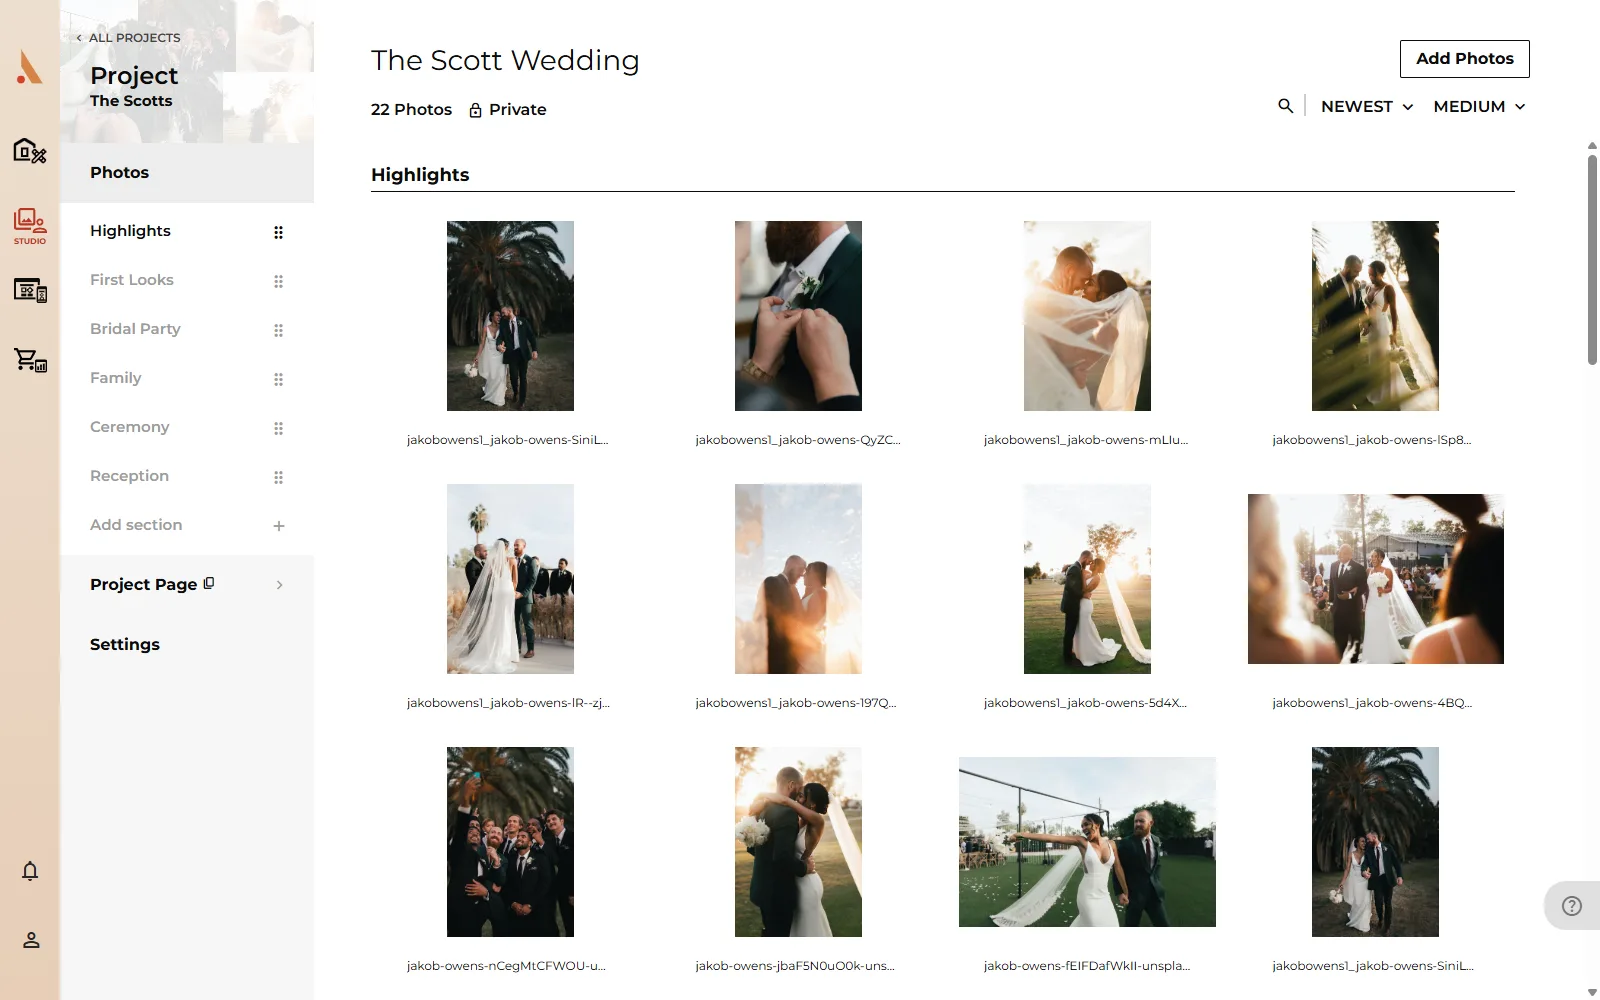
- Open your new client and click Create Project.
- Give the project a name your client will recognize, like "Engagement Session".
- Open the project and drag your photos in, or click Add Photos to browse for files.
- Watch the progress indicator in the corner. You can keep working while photos upload.
 Uploads count against your plan's storage. See Storage and plan limits if you're not sure how much room you have.
Step 3: Style the gallery
Your gallery works out of the box, but a minute of styling makes it yours.
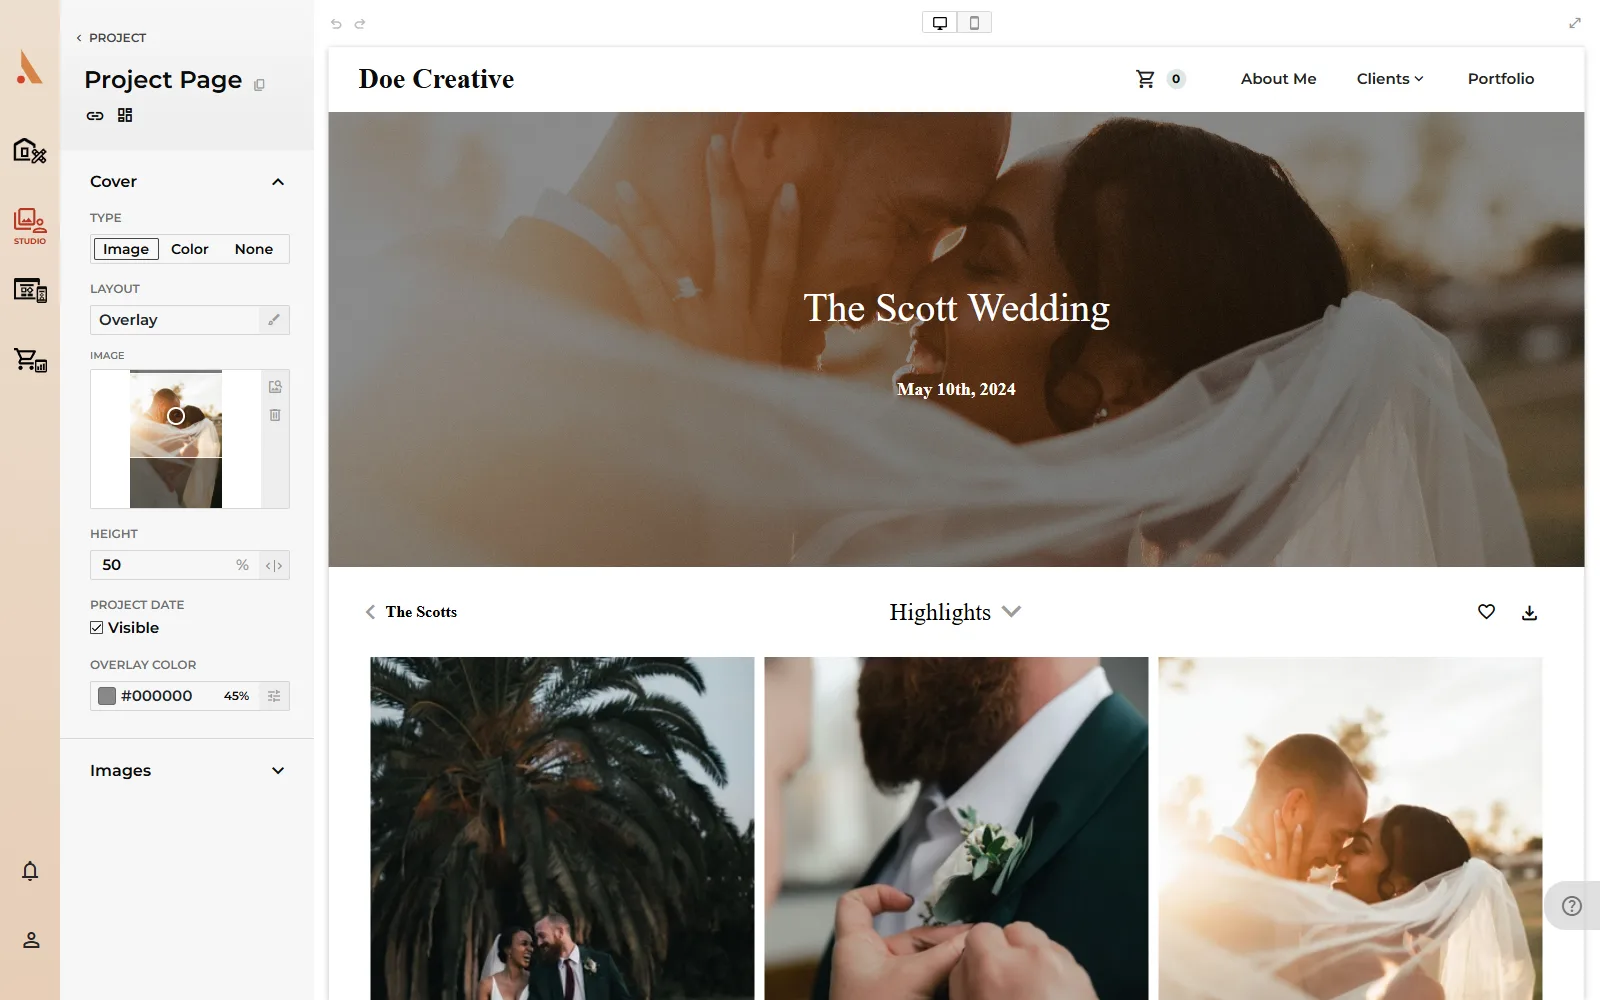
- From the project, open the Project Page tab.
- Pick a gallery template as a starting point. You can browse them all under Studio → Gallery Templates.
- Adjust the cover photo, colors and typography to match your brand.
 More detail in Customize your gallery.
Step 4: Share it with your client
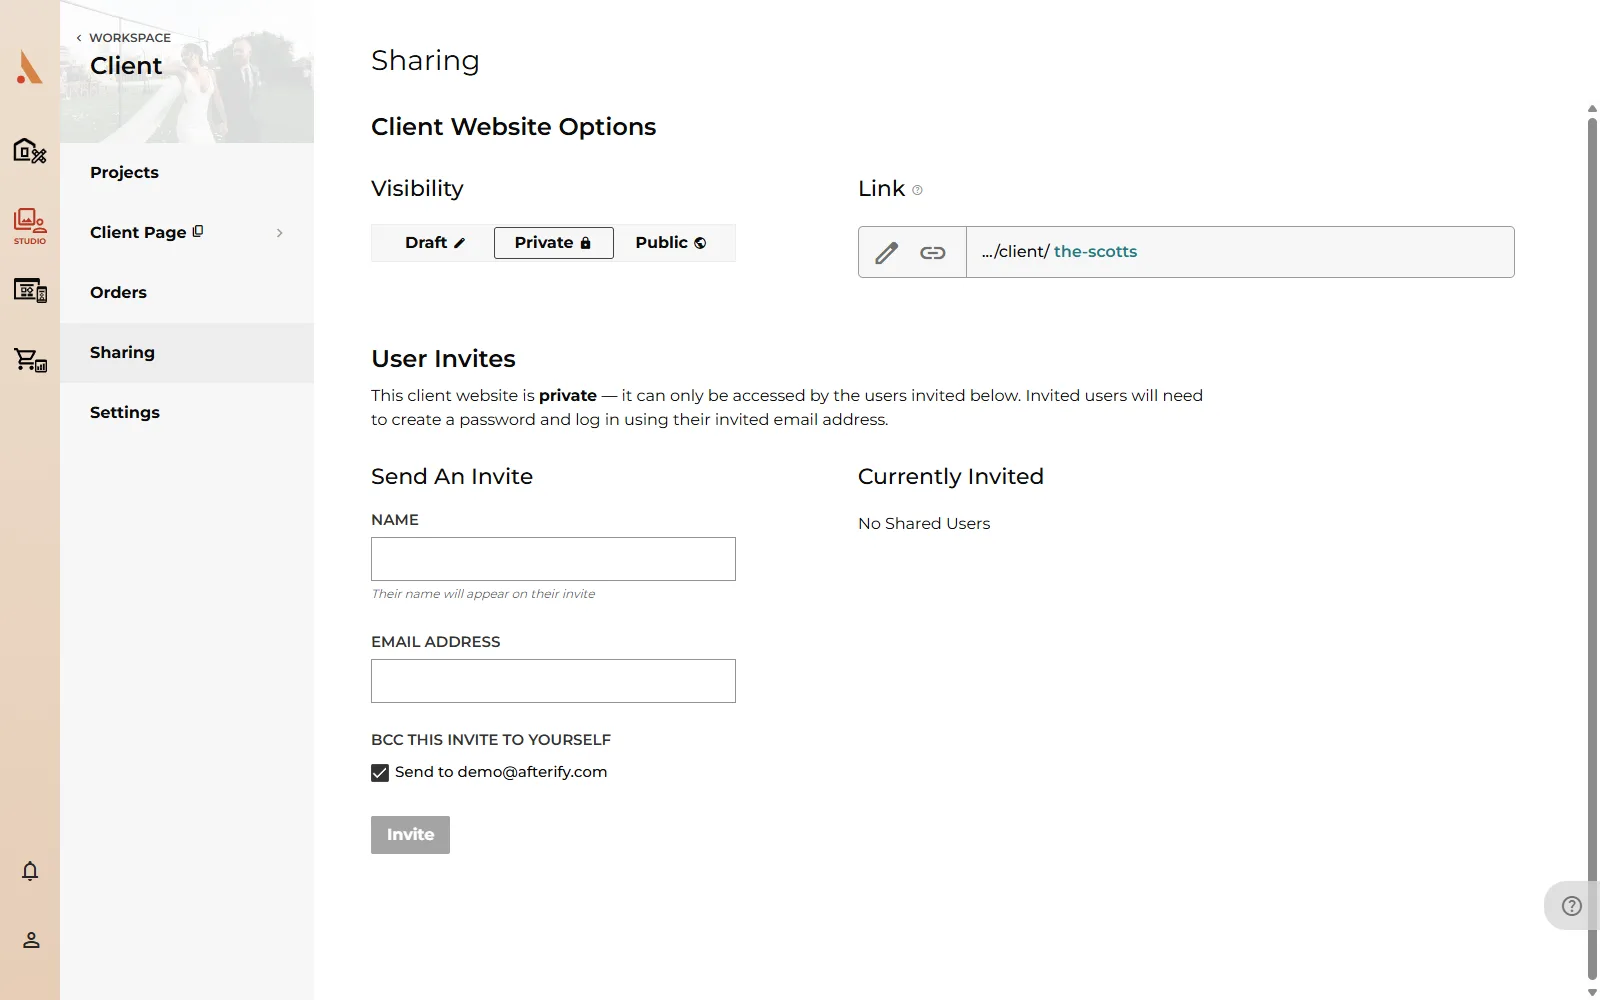
- Open your client and go to the Sharing tab. Sharing lives on the client, not the individual project, since access covers everything you've published for them.
- Choose how your client gets access: a shareable link, or a personal email invite.
- For an invite, click Send An Invite, enter your client's name and email, and send.
Your client receives an email with a single-use code that creates their account and unlocks the gallery. The full flow (including resending and revoking access) is covered in Invite clients by email.
What's next
- Sell prints and downloads: set up your store, connect Stripe and publish a price sheet. Start with the store setup overview.
- Build your website: Afterify creates your site the first time you open the Website section. See Website basics.
- Protect your photos: add watermarks on paid plans.
Related
Still stuck?
We're happy to help. Contact support and we'll get back to you as soon as we can.